From the Studio: DIY Spring Bowl Fillers (Because Your Table Deserves a Seasonal Outfit)
- Feb 18
- 2 min read
Every season your home deserves a wardrobe change. Spring is not optional. The decor demands it.
Today we’re making DIY Easter/spring bowl fillers — soft little fabric bundles that look like they came from a boutique cottage shop where everything smells like lavender and emotional stability.
They’re cute. They’re fast. They’re dangerously addictive to make.
Let’s get into it.
What You’ll Need
Pastel fabric scraps (linen, cotton, muslin — soft spring colors)
Yarn, twine, or embroidery thread
Polyfill stuffing
Scissors
Needle + thread or hot glue
Faux greenery or moss
Tiny faux flowers or dried florals
Optional: mini wooden eggs, beads, lace, ribbon scraps
Spring rule: if it looks like an Easter basket exploded, you’re doing it right.
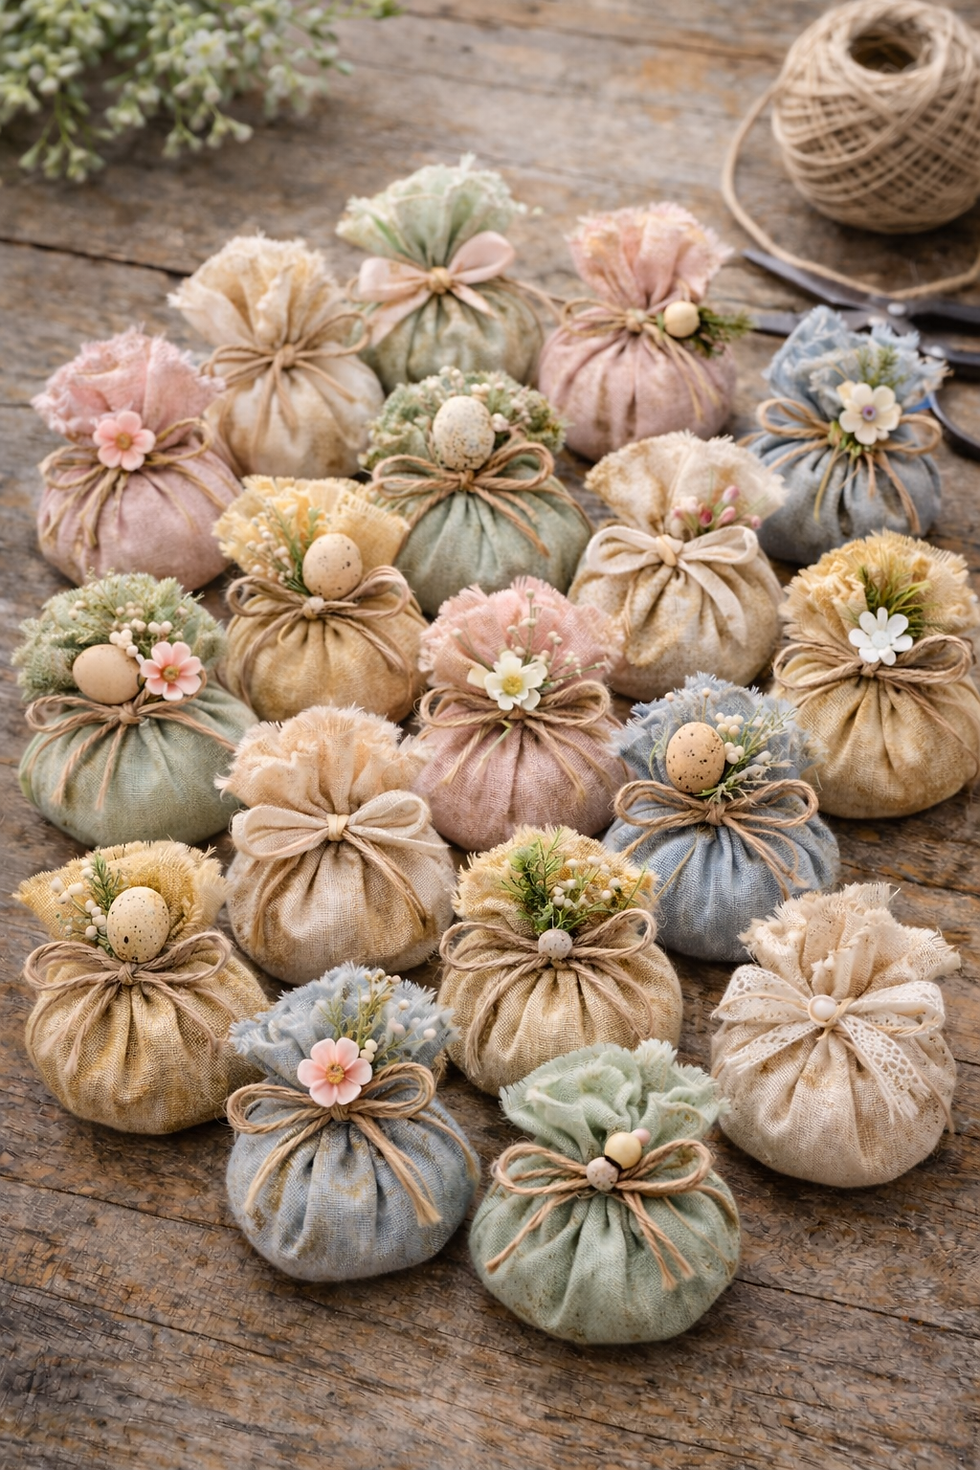
Step 1: Cut Soft Spring Squares
Cut your fabric into 4–5 inch squares in mixed pastel tones:
soft pinkdusty bluebutter yellowsage greencream or neutral
They should not match perfectly. We want curated spring chaos.
Cut 6–10 squares depending on how full you want your display.

Step 2: Stuff & Shape Your Spring Puffs
Place stuffing in the center of each square.
Lift the corners up and gather them into a little pouch shape. It will look like a baby carrot sack or a pastel ghost. Both are correct.
Tie tightly with twine or thread.
Don’t flatten them — spring decor should feel plush and cozy, like it survived winter and is thriving.
Repeat until you have a pastel army.

Step 3: Add Easter Personality
Now we accessorize, because spring is extra and we support her.
Attach one embellishment per puff:
tuck in a tiny faux flower
glue a mini wooden egg to the knot
tie a soft ribbon bow
add a bead or lace wrap
tuck in moss for a nest-like look
Each puff should feel like it has a job in the Easter basket ecosystem.
Some are floral. Some are neutral. Some are dramatic. Let them live.

Step 4: Soft Vintage Distress (Optional but Elite)
If your fabric looks too new, gently crumple it.
For a cottagecore touch, lightly brush edges with diluted coffee or tea. Let dry fully.
This gives that soft vintage spring vibe — like it’s been part of your decor forever, even though you made it 20 minutes ago.
We love a craft with lore.
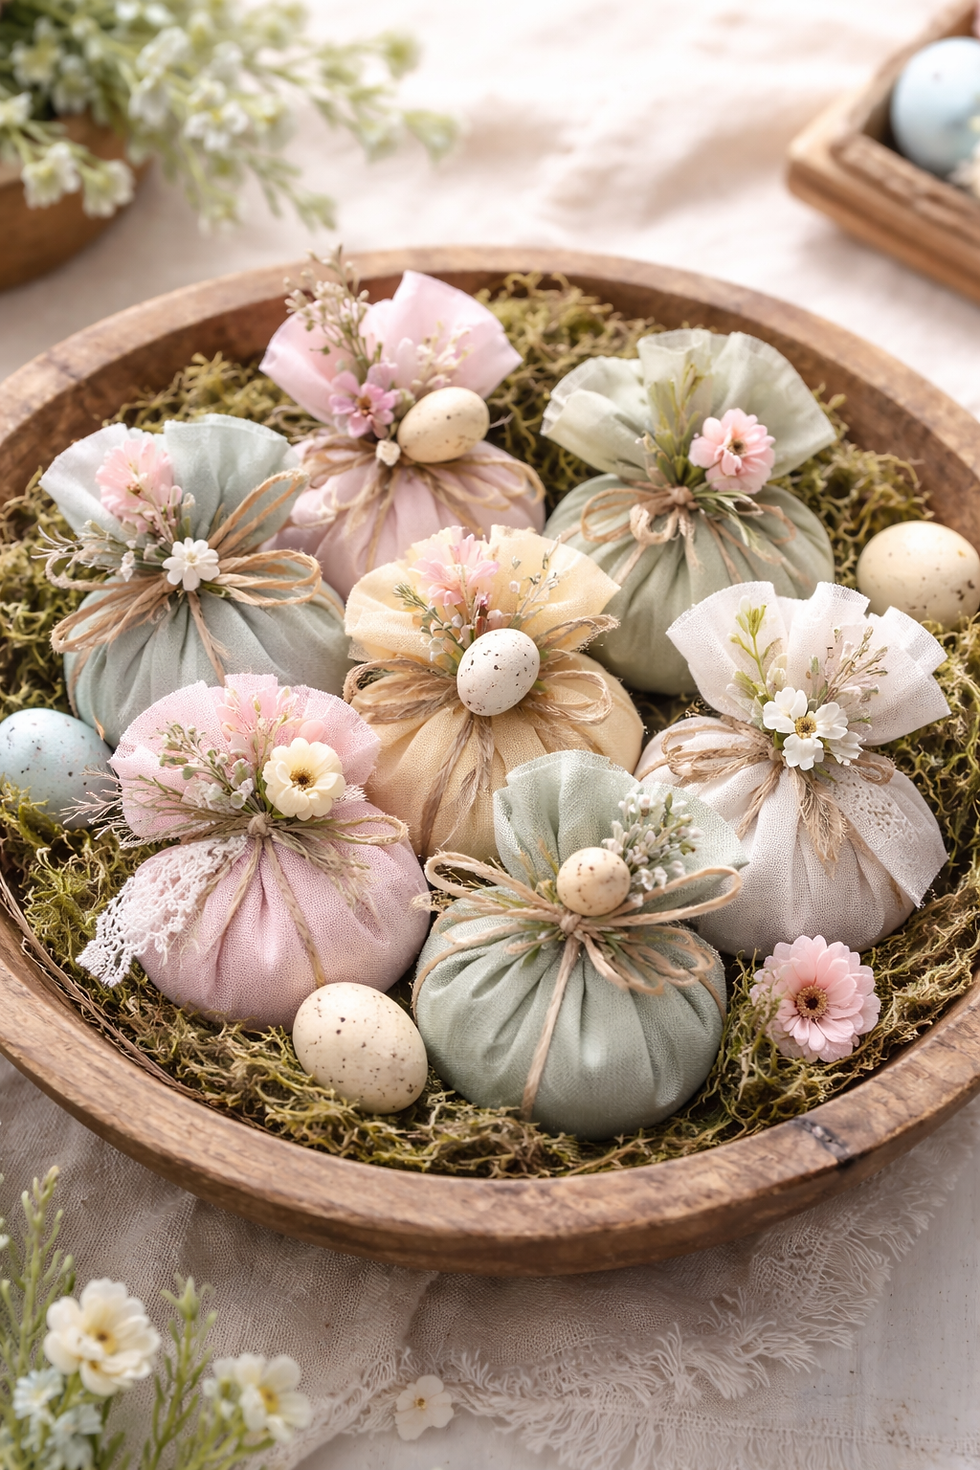
Step 5: Style Your Spring Bowl
Fill a wooden bowl, tray, or basket with moss or greenery first.
Layer your fabric puffs on top. Mix colors so nothing clumps too much in one area. Add a few loose mini eggs or flowers around them.
Step back. Adjust. Rotate. Overthink. Adjust again.
Congratulations — your table is now seasonally dressed.

Final Thoughts from the Studio
This is one of those crafts that looks high effort but secretly isn’t. It’s perfect for using scraps, relaxing your brain, and pretending you’re starring in a cozy spring montage.
Handmade spring decor should feel soft, imperfect, and alive. If everything looks slightly uneven, congratulations — you nailed the aesthetic.
Perfection is for machines. Personality is for spring.


Comments